
If you’ve ever dreamed of having a lush, green lawn without the hassle of mowing, watering, and fertilizing, artificial grass is your perfect solution. Installing synthetic turf is easier than you might think, and when done correctly, it can last for years while maintaining its beauty and softness. Whether you’re covering a backyard, patio, or play area, learning how to install artificial grass on dirt can transform your space into a vibrant, low-maintenance haven.
In this article, we’ll walk you through a professional yet easy-to-follow, step-by-step guide for installing artificial grass directly on dirt — from preparation to finishing touches.
Why Choose Artificial Grass?
Before diving into the installation process, let’s quickly highlight why artificial grass has become so popular:
- Low Maintenance: No mowing, watering, or fertilizing required.
- Cost-Effective: Though the initial installation cost is higher, the long-term savings on water and lawn care make it worthwhile.
- Durability: With proper installation, artificial turf can last 10–20 years.
- Eco-Friendly: Saves water and reduces chemical fertilizer usage.
- Aesthetic Appeal: Always looks lush, green, and perfectly trimmed year-round.
How To Install Artificial Turf On Dirt
Now that you know the benefits, let’s move to the main part — installing artificial grass on dirt.
Step 1: Gather Your Tools and Materials
Before you begin, make sure you have everything ready. Here’s what you’ll need:
- Artificial grass roll
- Shovel and rake
- Wheelbarrow
- Tape measure
- Utility knife or turf cutter
- Landscape fabric (weed barrier)
- Crushed rock or decomposed granite (base layer)
- Sand infill (optional but recommended)
- Turf joining tape and adhesive
- Turf nails or landscape staples
- Plate compactor or hand tamper
- Broom or power brush
Having the right tools ensures your installation goes smoothly and the result looks professional.
Step 2: Clear and Prepare the Area
Start by removing any existing grass, weeds, rocks, or debris from the dirt area. Use a shovel or turf cutter to dig out the top 3–4 inches of soil.
This step is crucial — it allows room for the base materials that help with drainage and keep the grass level.
Once cleared, rake the surface to make it smooth. If your soil is particularly clay-heavy or compact, you may need to improve drainage by adding a few inches of crushed rock later.
Step 3: Create a Stable Base
The base layer ensures proper drainage and prevents uneven surfaces or sinking over time. Spread a layer of crushed stone, decomposed granite, or gravel about 2–3 inches thick over the dirt.
Use a plate compactor or hand tamper to firmly compact the base until it’s solid and level. The goal is to create a stable, even foundation that won’t shift or settle.
Pro Tip: Lightly spray the base with water while compacting to help it settle better.
Step 4: Install a Weed Barrier
Next, roll out a landscape fabric or weed barrier across the area. This prevents weeds from growing up through your artificial grass while still allowing for proper drainage.
Overlap the edges of the fabric by at least 2–3 inches and secure it with landscape staples or nails. Trim the excess fabric along the edges.
Step 5: Roll Out the Artificial Grass
Now comes the exciting part — laying the turf!
Unroll your artificial grass and let it sit in the sun for about 1–2 hours. This allows it to relax and expand to its full size, making installation easier and preventing wrinkles.
Lay the turf pieces in the same direction for a natural look. If you’re covering a large area with multiple rolls, make sure the grass fibers all face the same way to maintain uniformity.
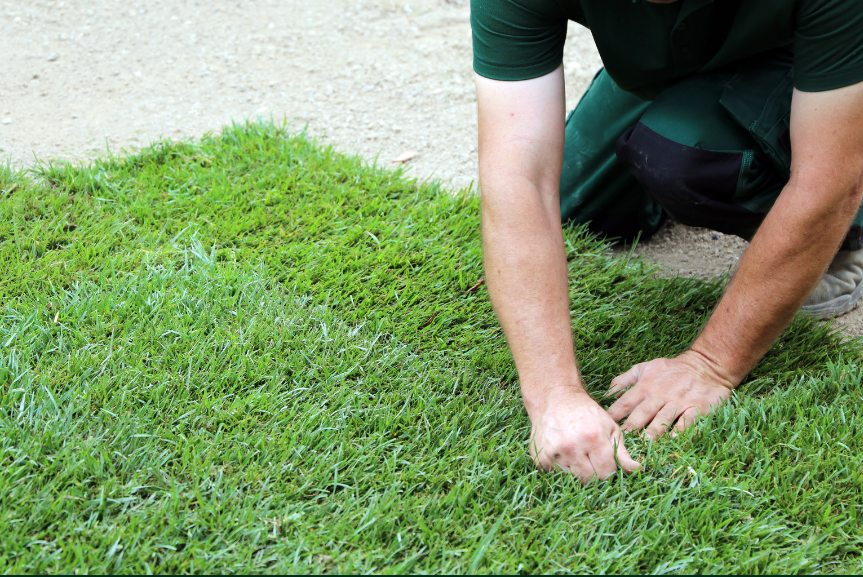
Step 6: Trim and Fit the Turf
Use a sharp utility knife to trim excess grass along the edges and around obstacles like trees or pathways. Cut carefully along the backing, not through the fibers.
Take your time — precise cutting ensures a clean, professional finish.
Step 7: Join the Seams
If you have multiple pieces of turf, join them using turf joining tape and adhesive or special turf seam tape.
- Place the pieces side by side with the edges slightly touching (not overlapping).
- Lay the seam tape sticky side up beneath the joint.
- Apply adhesive evenly, then press the turf edges onto the tape.
Smooth out the seams to ensure they’re invisible and perfectly aligned. For a flawless finish, make sure the grass blades blend naturally across the seam.
Step 8: Secure the Edges
Use landscape nails or turf staples every 6–8 inches around the perimeter to secure the turf to the ground.
Drive the nails just below the surface of the grass — not through the fibers — to keep them hidden. For extra stability, add a few nails throughout the center area as well.
If your installation borders a concrete or paved area, you can use landscape edging or turf adhesive for a clean edge.
Step 9: Add Sand Infill (Optional but Recommended)
While not strictly required, sand infill helps weigh down the turf, improves drainage, and keeps the blades standing upright.
Use silica sand or non-absorbent infill material and evenly spread it across the surface using a drop spreader. A layer of about 1–2 pounds per square foot is ideal.
Once spread, use a stiff broom or power brush to work the sand into the turf fibers. This also helps fluff up the grass for a more natural appearance.
Step 10: Final Touches and Maintenance Tips
Give your new lawn a final brush to lift the blades and even out the infill. Check all edges and seams to ensure everything is secure and tidy.
You’re done — your artificial lawn is now ready to enjoy!
To keep it looking its best:
- Rinse occasionally to remove dust and debris.
- Brush regularly to maintain the upright position of the fibers.
- Remove leaves or twigs with a leaf blower or broom.
- Check for loose edges and re-secure if necessary.
Common Mistakes to Avoid
Even a small oversight can affect the appearance and longevity of your turf. Here are a few things to watch out for:
- Skipping the base layer: This leads to poor drainage and uneven surfaces.
- Not compacting properly: Results in sinking or wrinkles.
- Uneven seams: Creates visible lines and an unnatural look.
- Using wrong infill material: Always use silica sand or turf-specific infill.
- Ignoring direction of grass blades: Causes inconsistent appearance.
Avoiding these mistakes ensures your artificial lawn looks flawless and lasts for years.
Final Thoughts
Installing artificial grass on dirt is a practical and rewarding DIY project. With a little preparation and attention to detail, you can transform any patch of bare soil into a stunning, evergreen space that enhances your home’s beauty and functionality.
From backyard play areas to relaxing patios, synthetic turf adds comfort, style, and convenience — no watering, mowing, or mud!
So roll up your sleeves, follow these steps carefully, and enjoy the satisfaction of creating your own low-maintenance, picture-perfect lawn that stays green all year round.
You May Also Like
How Much Does Artificial Grass Cost in 2025?
10 Artificial Grass Front Yard Ideas to Elevate Your Curb Appeal
How To Choose The Best Artificial Grass For Pool Areas & Pool Decks: Complete Buyer’s Guide
Types of Artificial Turf: Which One Is Right for You?
Understanding the Differences Between Artificial Turf and Artificial Grass


